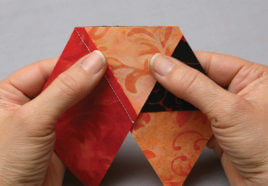
When working with different angles such as 45 and 60 degree, there are points that stick out past the seam allowance that are often called “dog ears”. I refer to them as ears throughout this article. These points happen when the seam allowance of one shape extends beyond the adjacent shape’s edge.
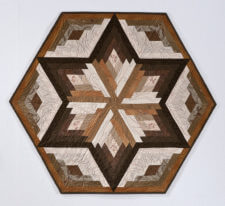 All of my 60 degree designs have these ears at some point in the construction. Here are two of my new designs published as patterns by C&T. The Log Cabin Star is a variation of a design from Not Your Grandmother’s Log Cabin, by Sara Nephew and myself.
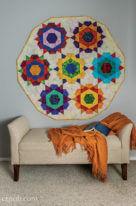
Rose Star is a very traditional design that while I was sewing it, I found a fun way to chain-piece set-in seams! That is another story for another time. Let’s get to today’s topic.
The question I will answer is whether or not it is worth trimming the ears and if so, when is the time to do it. I am sure by the end of the discussion you will know whether I bothered or not to trim for these two projects.
Most often quilters trim the ears after sewing pieces together to reduce bulk and to prevent darker fabrics from shadowing through lighter fabrics near the intersections. These two reasons are great for some people. For myself, I do not care about the bulk nor the shadowing, so it is not worth my time. However, I have learned that easier, faster, and more precise piecing happens when the trimming is done before sewing pieces together. Now that has my attention! More precision at the same time as easier and faster – who wouldn’t want that?
Here is why it is faster, easier, and more precise: To get a great join of the shapes, the seam needs to go from one intersection (where the fabrics cross) to the other intersection in a straight line. Any variation in cutting, seam allowance, or positioning of the ears will give poor results that can be frustrating. Trimming the ears removes the guesswork on where to position the pieces.
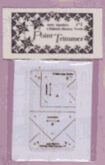
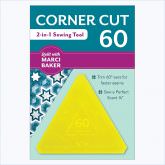
Many designers have realized this and therefore developed tools to alleviate the frustrations. Marti Michell created the Perfect Patchwork Corner Trimmer for 45 and 90 degree angles, Judy Martin designed the Point Trimmer specifically for 45 degree angles, and I developed the Corner Cut 60 for 60 degree angles. There are also individual templates that have a tip missing to align to the fabric edge, so the ear is never there.
 |
 |
 |
Each of these tools allows the quilter to remove the excess fabric when cutting the shapes, then align the pieces easily with no guessing for faster sewing, and finally prevents shadowing and reduces bulk; all of the benefits in one fell swoop.
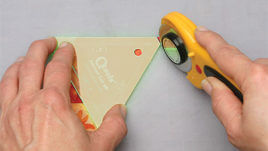
You may be thinking “I know my seams and I do just fine.” That is exactly what I said even though I had designed the Corner Cut. Some students struggled to understand what needed to be aligned and I knew this tool would help them be successful but I did not need it. Then one day in class, I demonstrated using a student’s pieces that had been trimmed. Oh my! Aligning the pieces was so much quicker that I enjoyed the process even more.
However I still did not use the tool. It wasn’t worth my time and effort to trim every single corner of the pieces, especially the way my students did in class – one piece at a time – too much trouble. I kept hoping the quilting elves would come in the middle of the night and trim them for me, but they never did. Then it dawned on me that the time to trim the ears is when I first cut the shapes. This may be 6 layers at a time, like I do when sewing the two designs shown above. So 11 years after introducing the tool, I finally used the Corner Cut 60 for what it was designed to do!
Meanwhile, I had been using it for another purpose…I designed it with three different seam allowance sizes: scant 1/4, true 1/4, and a generous 1/4, to allow for the various quilting seam allowances. Because of this, my staff pointed out that we can mark a scant 1/4 on any sewing machine and get the same seam allowance every time.
So the Corner Cut 60 is a dual purpose tool that I do not sew without. In fact I have one at my cutting station and one at my sewing machine. And if you are thinking, “Oh my, is she that obsessed with perfect seams?”, the answer is no. This concept just gets 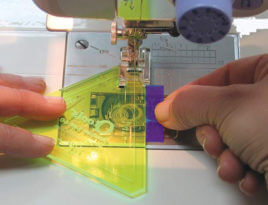 quilters closer to more precision, more quickly. And there are still adjustments made in the seam allowance – because that’s what seam allowances are for – to hide variations in our piecing with great points on the front.
So the answer to the question: Yes, it is worth trimming the ears especially before sewing! So when you start trimming the ears for your 45 and 60 degree piecing, I hope you will find your sewing to be even easier like I did and …
…that you enjoy your quilting even more!
— Marci


Leave a Reply
You must be logged in to post a comment.