Rotary cutting is a fantastic way to make your quilting quicker, more accurate, and more enjoyable. Here are five tips to help you cut successfully right away!
1. The Importance of Using the Right Tools
Mats: In working with different mats, I have found that the finish texture is very important. Olfa is the brand that I recommend over any other. The fabric stays put, rotary cutter blades remain sharper longer, and the mat lasts a long time. Remember to cut on different areas of the mat so you’re not always cutting on just one line. One drawback is that a brand new one has a funny smell when you pull it out of the package. There’s no way to avoid that and they last a long time so it’s worth putting up with!
Rotary Cutter: My favorite is the ergonomic design by Olfa. It closes automatically when the handle is released. This style can to be set up left handed or right handed so that the blade is visible when cutting.
2. Aligning the Fabric
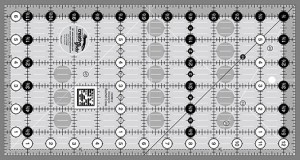
Most cutting mats have grid lines on one side designed to provide a visual for lining up the fabric. However, these lines can be distracting and add extra complexity to the cutting process. That is why I recommend that you use the Omnigrid or Creative Grid rulers; they both have clear and easy to read markings which can greatly assist you with the cutting process.  I suggest using the mat only to protect the surface of the table and the blade of the cutter.
Use the measuring lines on your ruler so you only have to align two tools with your fabric; the ruler and the rotary cutter. By using only the ruler, the fabric is held in place while I’m measuring (because what I want to keep is under the ruler) and I am only aligning ruler to fabric…less variables…it takes me less time!
3. Double Folding Fabric
I find that double folding my fabric gives me more control while cutting since shorter cuts have less room for error.
When I use a 24” ruler and single fold the fabric I either need to take more time to reach across (moving my hand up the ruler), or the ruler slides at the end causing a crooked cut in the middle. It’s nice to get the right cut the first time rather than having to figure out how to get around the issue. Tall tables or a stressed back will also benefit from double folding since I have more control and ease in cutting!
4. Covering the Selvages
When double folding, I generally align the first fold to the selvages, aligning with lengthwise grain. Then, this fold comes up and covers the selvages so I can’t see them any more. The single fold is parallel to the selvages, so it becomes my guide as to what is true. By covering the selvages, I can see what really matters – the folds. (If the fold is only up to the selvages, I usually have a hard time seeing the fold because it is fabric on the same fabric.)
5. A Good Cut
From here on out simply make sure that the folds are parallel to each other and perpendicular to the edge of the ruler. If they are you will know the strip will be straight because you can make a smooth, short cut without the ruler moving.
I always recommend using Cutting Edge on the underside of the ruler making the ruler stop quickly, easily, and accurately at the edge of the fabric so I get a consistent size every time.
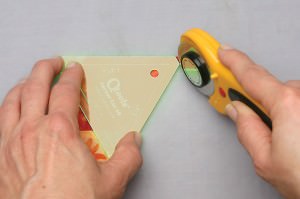
When making the cutting motion, align your shoulder, elbow, and wrist in line with the cut that is to be made. This gives more control and all of the cutting force is going forward with the cut rather than pushing the ruler to one side.
Remember that practice makes perfect! You may also like viewing our video tutorial on Rotary Cutting.
Enjoy your quilting!
Marci


Leave a Reply
You must be logged in to post a comment.